<< Previous tutorial : basic usage mapnik with nodejs [part 1]
Now in this tutorial we will learn mapnik+nodejs with postgis(postgresql). So before you continue this tutorial, you must already installed postgresql+postgis+phppgadmin.
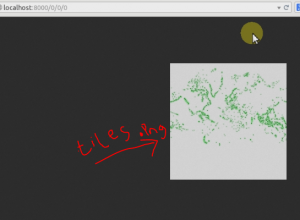
Ok, in this tutorial we will generate tiles (.png) from postgis record with mapnik and then display that tiles on leaflet map. This is the final output :

Let’s start the following tutorial ! 🙂
CREATE USER, DATABASE, EXTENSION FOR POSTGIS
1) First, we must create user in postgis. For example i create user : ‘gisuser’.
$ sudo -u postgres createuser gisuser
2) Next, create database ‘gis’ with owner ‘gisuser’
$ sudo -u postgres createdb –encoding=UTF8 –owner=gisuser gis
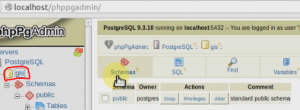
So, if you look on http://localhost/phppgadmin, you will see database ‘gis’.
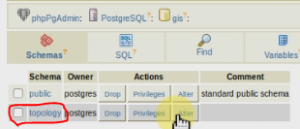
3) Next, create 2 extension postgis in database ‘gis’
$ psql –username=postgres –dbname=gis -c “CREATE EXTENSION postgis;”
$ psql –username=postgres –dbname=gis -c “CREATE EXTENSION postgis_topology;”
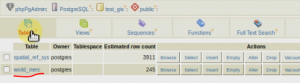
After run it, it will create 2 table inside database ‘gis’, like this :

**If you get error when create 2 extension postgis, like this :
psql: FATAL: Peer authentication authentication failed for user "postgres"
to fix it you must edit pg_hba.conf :
$ sudo vi /etc/postgresql/9.3/main/pg_hba.conf
– find :
# Database administrative login by Unix domain socket
local all postgres peer
– change to :
# Database administrative login by Unix domain socket
local all postgres trust
– then restart your postgresql :
$ sudo service postgresql restart
**Or if you get error again like this :
ERROR: could not open extension control file "/usr/pgsql-9.3/share/extension/postgis.control": No such file or directory
to fix it, install postgis again with the following command :
$ sudo apt-get install postgis*
CREATE DATABASE ‘test_gis’
Next, create database ‘test_gis’. We will use database ‘test_gis’ to store the .shp file as record.
– Open http://localhost/phppgadmin
– Click Create Database, type database name with ‘test_gis’ and choose template ‘gis’ like this :
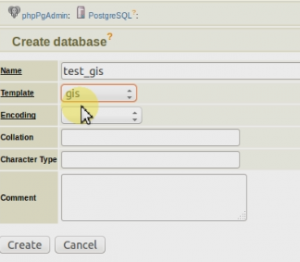
– Click Create, and then you can see 2 table ‘spatial_ref_sys’ and ‘topology’ inside database ‘test_gis’.
INSERT .SHP TO POSTGIS
If you follow the previous tutorial, we already download ‘example code’. Now, we will use the ‘example code’ in this tutorial. So if you doens’t read previous tutorial, please read first.
Next, we will insert .shp file to postgis as record. Execute the following command :
$ cd /home/noname/Downloads/node-mapnik-sample-code-master/data
$ shp2pgsql -I -s 4269 -W “latin1” world_merc.shp public.world_merc | psql -U postgres -d test_gis
![]()
SETTING DATABASE POSTGIS IN MAPNIK
Next, we must setting database on app.js :
$ cd ..
$ cd tile/database
$ sudo vi app.js
change dbname, table, user like this :

RUN MAPNIK
– Now, run mapnik with the following code :
$ node app.js 8000
It will execute app.js with port 8000.
– Next, open http://localhost:8000 to see the .png tiles :
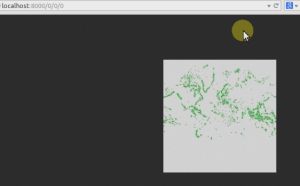
Awesome! 🙂
SHOW .PNG TILES ON LEAFLET MAP
The last step we will display .png tiles leaflet map. Leafet is open source javascript library for mapping. So first we must download leaflet.
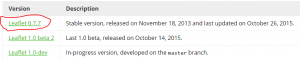
1) Go to http://leafletjs.com/download.html, click Leaflet 0.7.7 :
2) extract and move folder ‘leaflet’ into /var/www/html
3) create index.php and insert the following script to display tiles on leaflet map :
<!-- leaflet map -->
<link rel="stylesheet" href="leaflet/leaflet.css" />
<script src="leaflet/leaflet.js"></script>

<style>
body{margin:0px;}
#map { height: 600px; }
</style>
<div id="map"></div>


<script>
var map = L.map('map').setView([-8.9016455,125.6174445], 9);
    // needed token
    ACCESS_TOKEN = 'pk.eyJ1IjoibWFwYm94IiwiYSI6IjZjNmRjNzk3ZmE2MTcwOTEwMGY0MzU3YjUzOWFmNWZhIn0.Y8bhBaUMqFiPrDRW9hieoQ';
    L.tileLayer('https://api.tiles.mapbox.com/v4/{id}/{z}/{x}/{y}.png?access_token=' + ACCESS_TOKEN, {
        attribution: 'Imagery © <a href="http://mapbox.com">Mapbox</a>',
        id: 'mapbox.streets'
    }).addTo(map);

    // mapnik and postgis here
    L.tileLayer('http://localhost:8000/{z}/{x}/{y}', {
        attribution: 'Imagery © <a href="http://mapbox.com">Mapbox</a>',
        id: 'mapbox.streets'
    }).addTo(map);
</script>
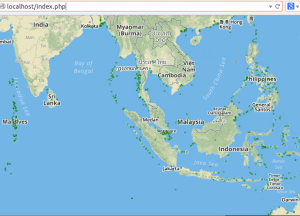
4) open http://localhost/index.php and BINGO !! you can see tiles with green color on map 🙂
FINISH! ‘Like Fans page Facebook’ if you like this tutorial. 🙂